Making of a Seax Knife (First Iteration)
Overview
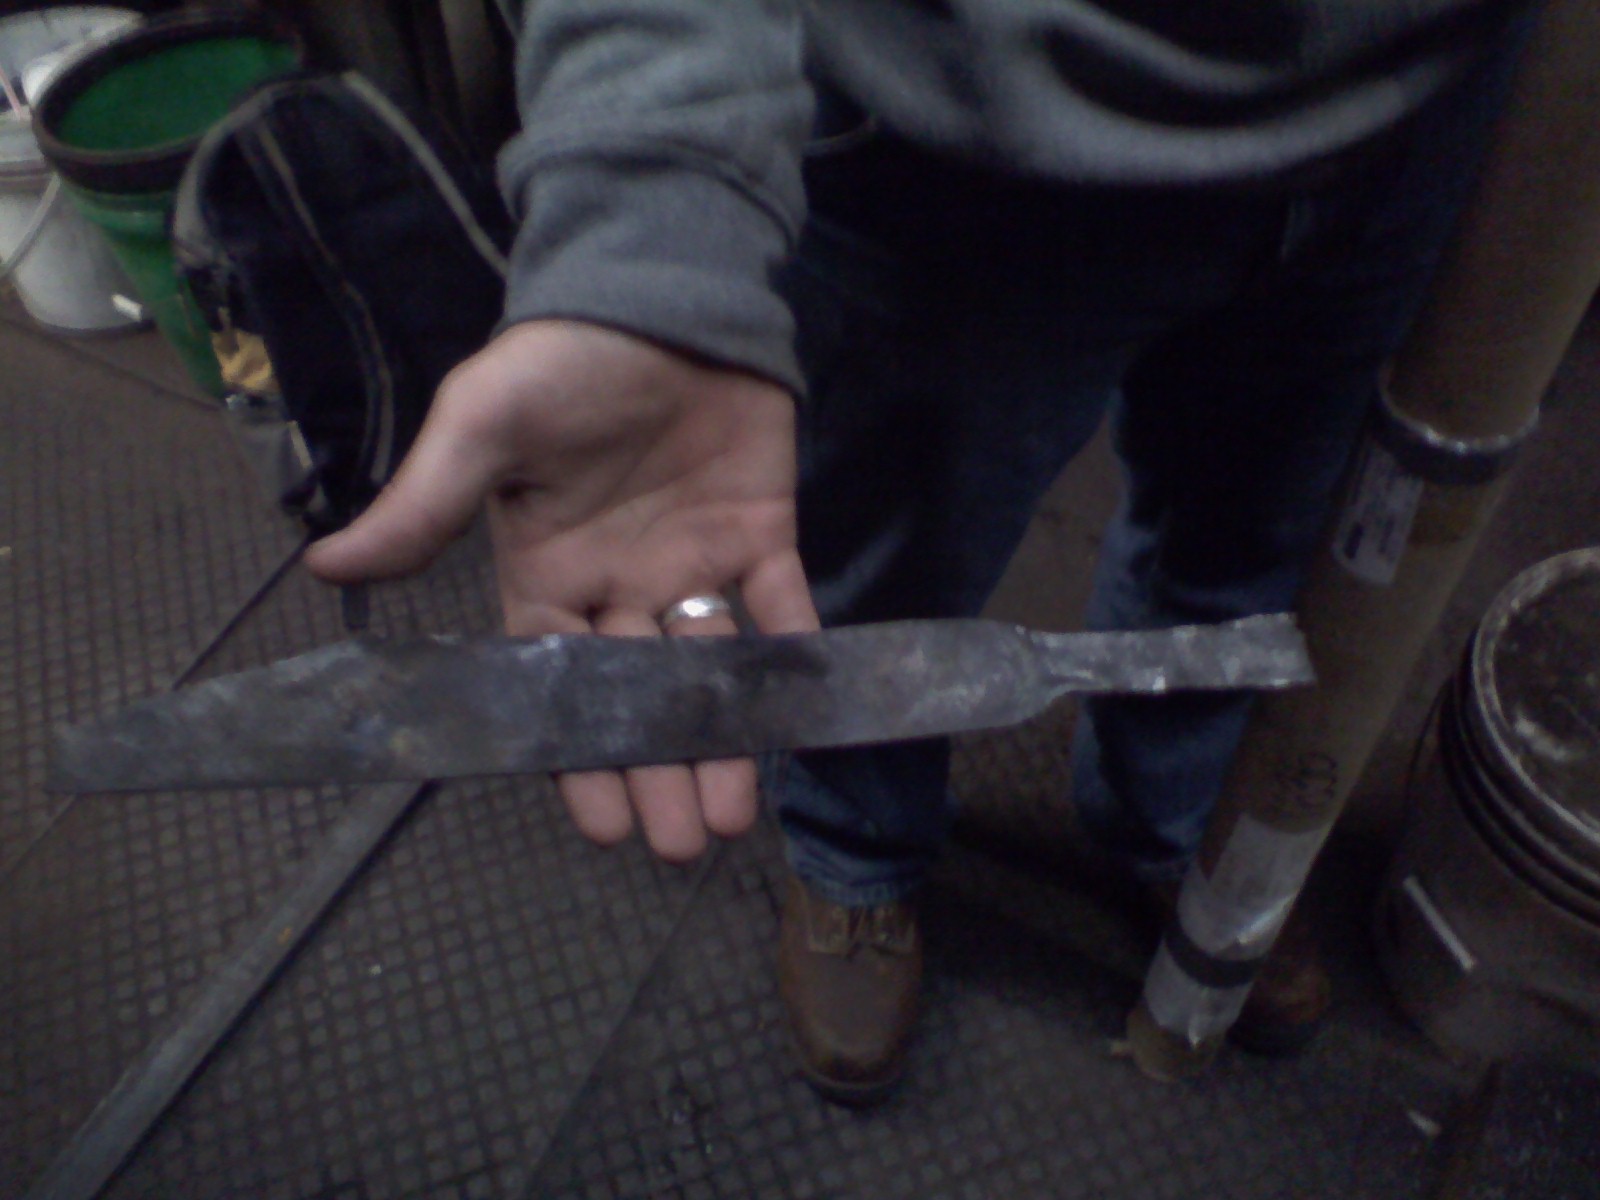
This page details the forging of our second Seax knife by Rick Wight and Luke Proctor. This second replica was started after the first, allowing us to learn from some earlier mistakes. Although the material we used was the same, a 1/4' by 1' bar of 1018 cold rolled steel, we cut off a shorter piece to start out with because we knew the process of drawing out the blade would give us significantly more length than the original bar. We also decided on a fundamentally different approach, opting to use “traditional” blacksmith tools over modern machines like plasma cutters whenever possible.
The Forging Process
Our first step was to hammer out the blade side of the Seax to form a noticeable (if still very dull) edge. Although this did produce very clear “sharp” and “dull” sides, our hammering also caused the blade to curve slightly. We corrected this by periodically hammering on the edges to straighten the replica, although this in turn had the effect of slightly dulling our “sharp” edge.
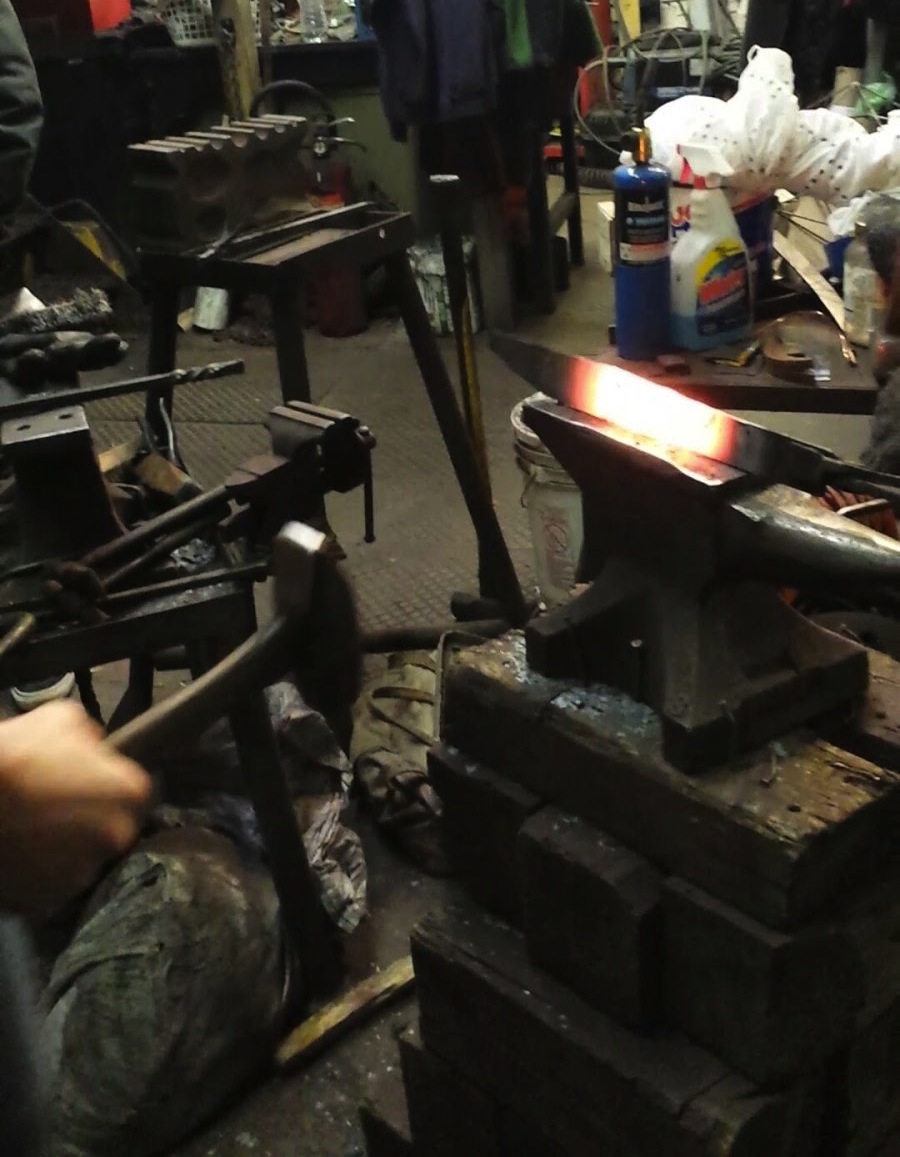
Figure 1 - Straightening the blade by hammering the edges. Note the pink-lined white glow: this is a bright yellow-orange in normal light.
It should be noted that over the course of this process, we generally aimed to get our replica to a “bright orange” or “yellow” heat. Although this makes the material very soft and easy to work, it also increases the risk of burning the metal if it is allowed to heat for too long. Although we were able to avoid any catastrophic damage, we did manage to burn our blade several times. In addition to altering the macrostructure of the material, this also left us with a rather rough and inconsistent texture across most of our blade.
Once we had a clearly defined blade, we decided to draw out the point. This was an important step to create the shape we wanted, as we not only needed to form the sharp tip but also the distinct “corner” on the dull edge of the blade which identifies the knife as a “broken back” Seax. We accomplished this by heating and hammering the “dull” edge very close to the end of the blade, pushing the excess material towards the tip and producing a very clear downward slope from the spot where we wanted the back to “break.” This did result in some minor warping which was easily corrected by hammering out the flat side. We wanted to make sure we didn’t leave a small tip to be inadvertently burnt off while we were working on a different part of the piece, so we did not finish the tip all at once, instead leaving it roughly half an inch across and still squared off.
 |
At this point, we decided it was important to clearly indicate where the tang ended and the blade began, so we used a hardy to notch both edges and went back to drawing out and realigning the blade. Once we were mostly satisfied with the length, width, and alignment, we began to work on the tang and the part of the blade adjacent to it. Due to an initial error of judgement, we decided to make the blade directly in front of the tang narrower than we actually wanted, although we were quickly able to correct the problem with no lasting damage done.
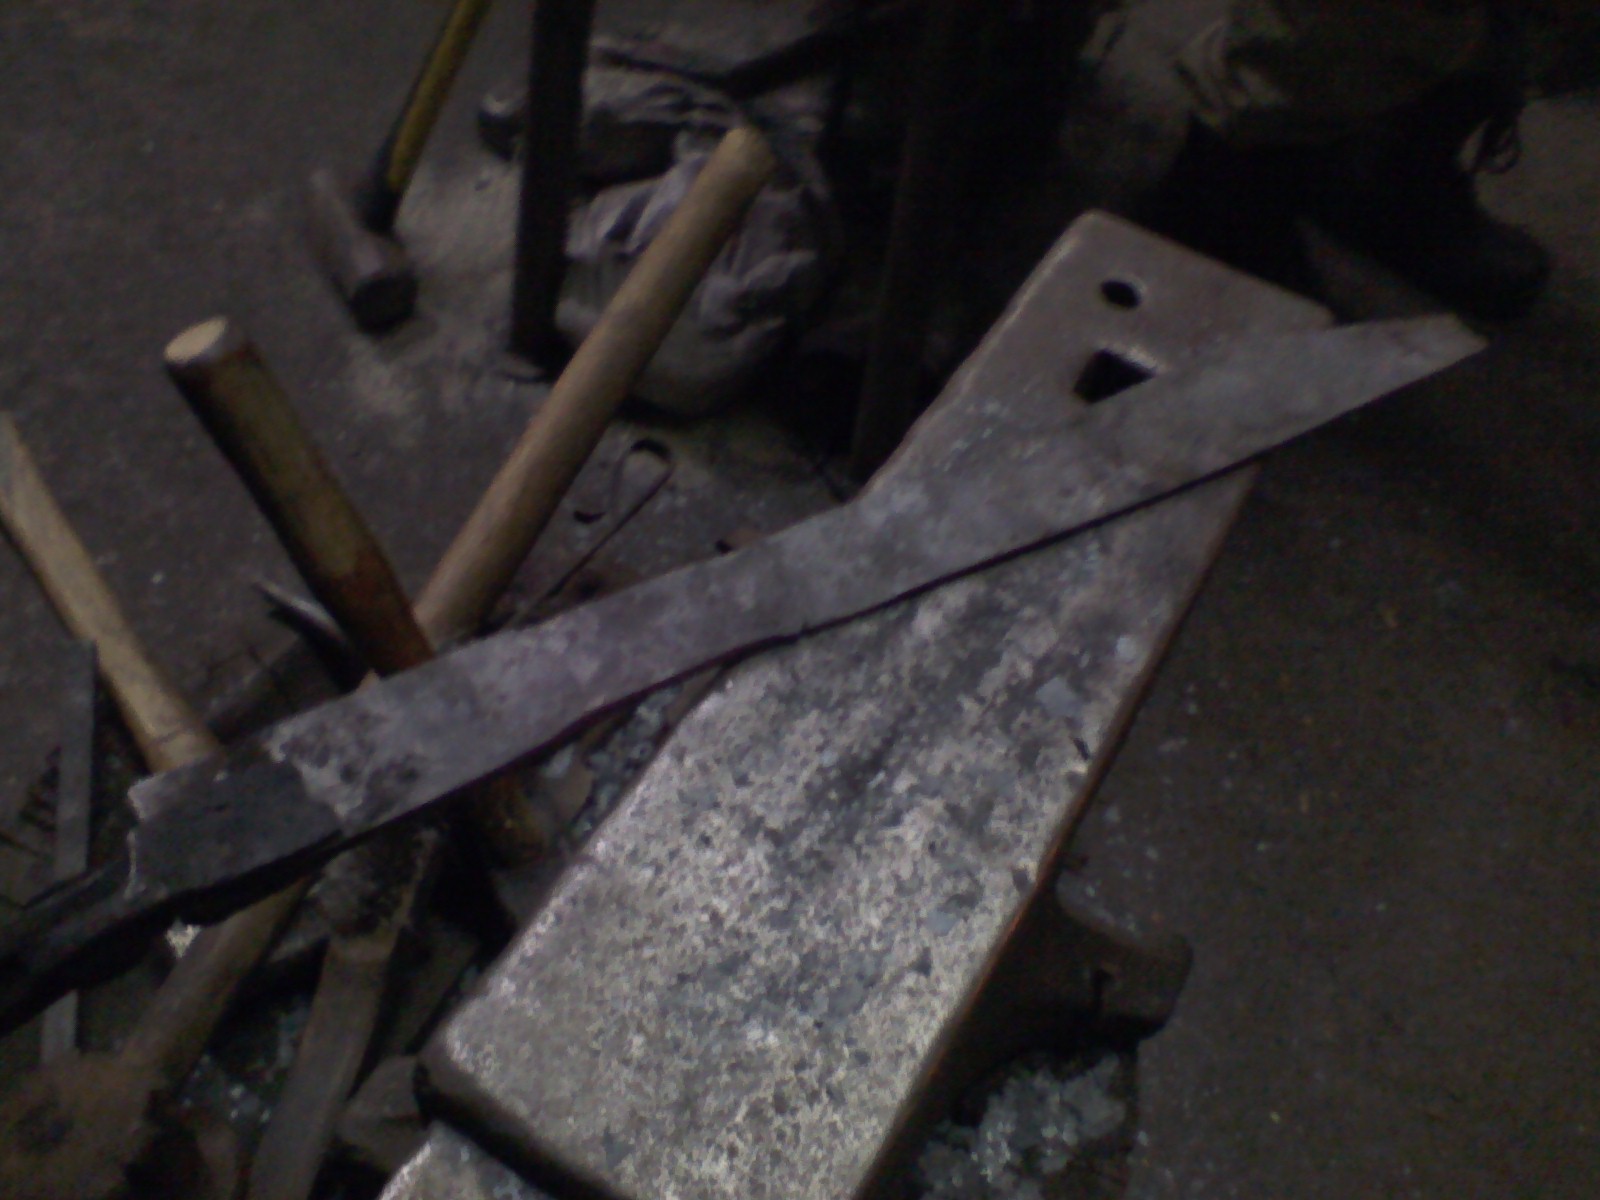 |
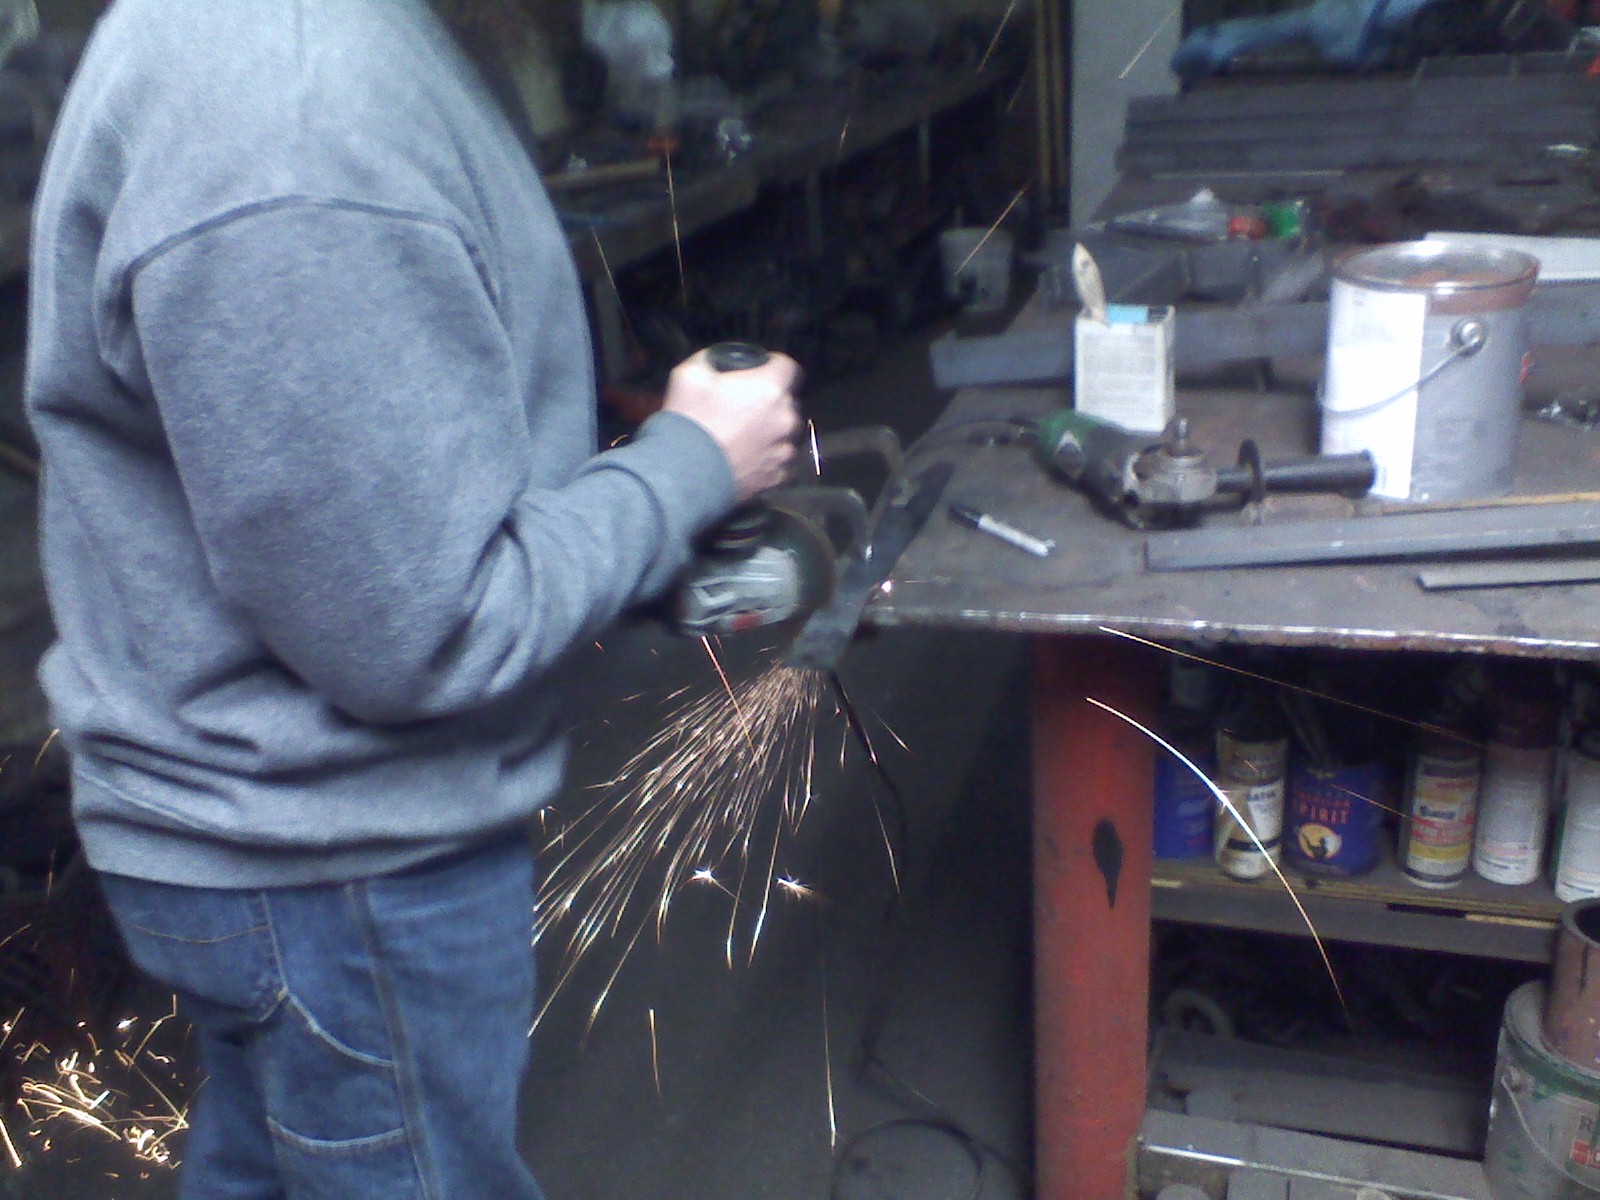
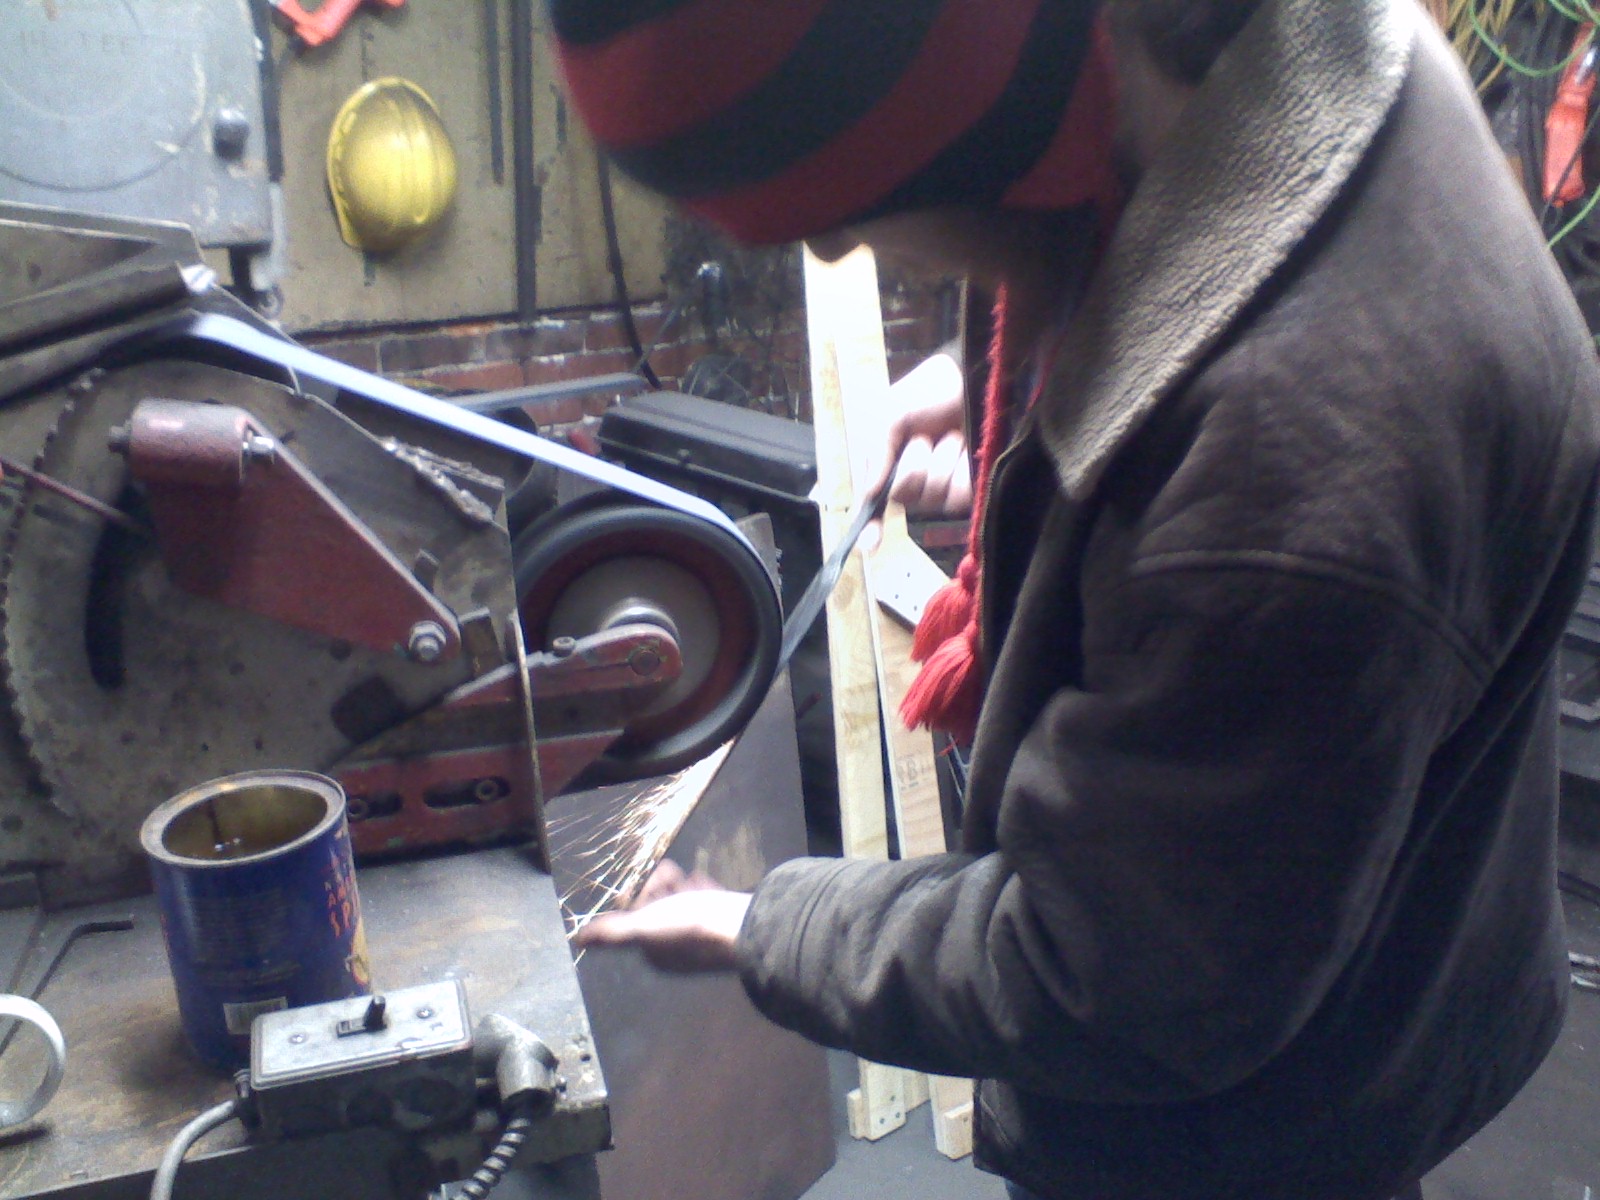
The tang end of our replica was roughly six inches long at this stage, more than twice as long as we wanted it to be. We decided to cut off about five inches in order to make the tang a more appropriate size. Although we considered cutting it using a hardy as a contemporary viking blacksmith probably would have, we ultimately decided that using a grinder would be much easier and opted to take advantage of living in the modern era in order to get a cleaner cut and save the time it would have taken to get the rather obstinate hardy back out of the anvil.
 |
At this point, all we had to do to fix up the tang was to make it shorter and thicker than the blade side by hammering down the edges. Unfortunately, due to some irrational nonchalance and a touch of basic negligence, we managed to expedite the process considerably by burning away a quarter-sized chunk of the metal we had left over for the tang. Although the absence of this material made the rest of the metal much easier to hammer into the correct shape and the severely warped and bubbly texture should be safely concealed by the handle of the final product, this was not at all our intent and we would be much more cautious if given the chance to do it again.
 |
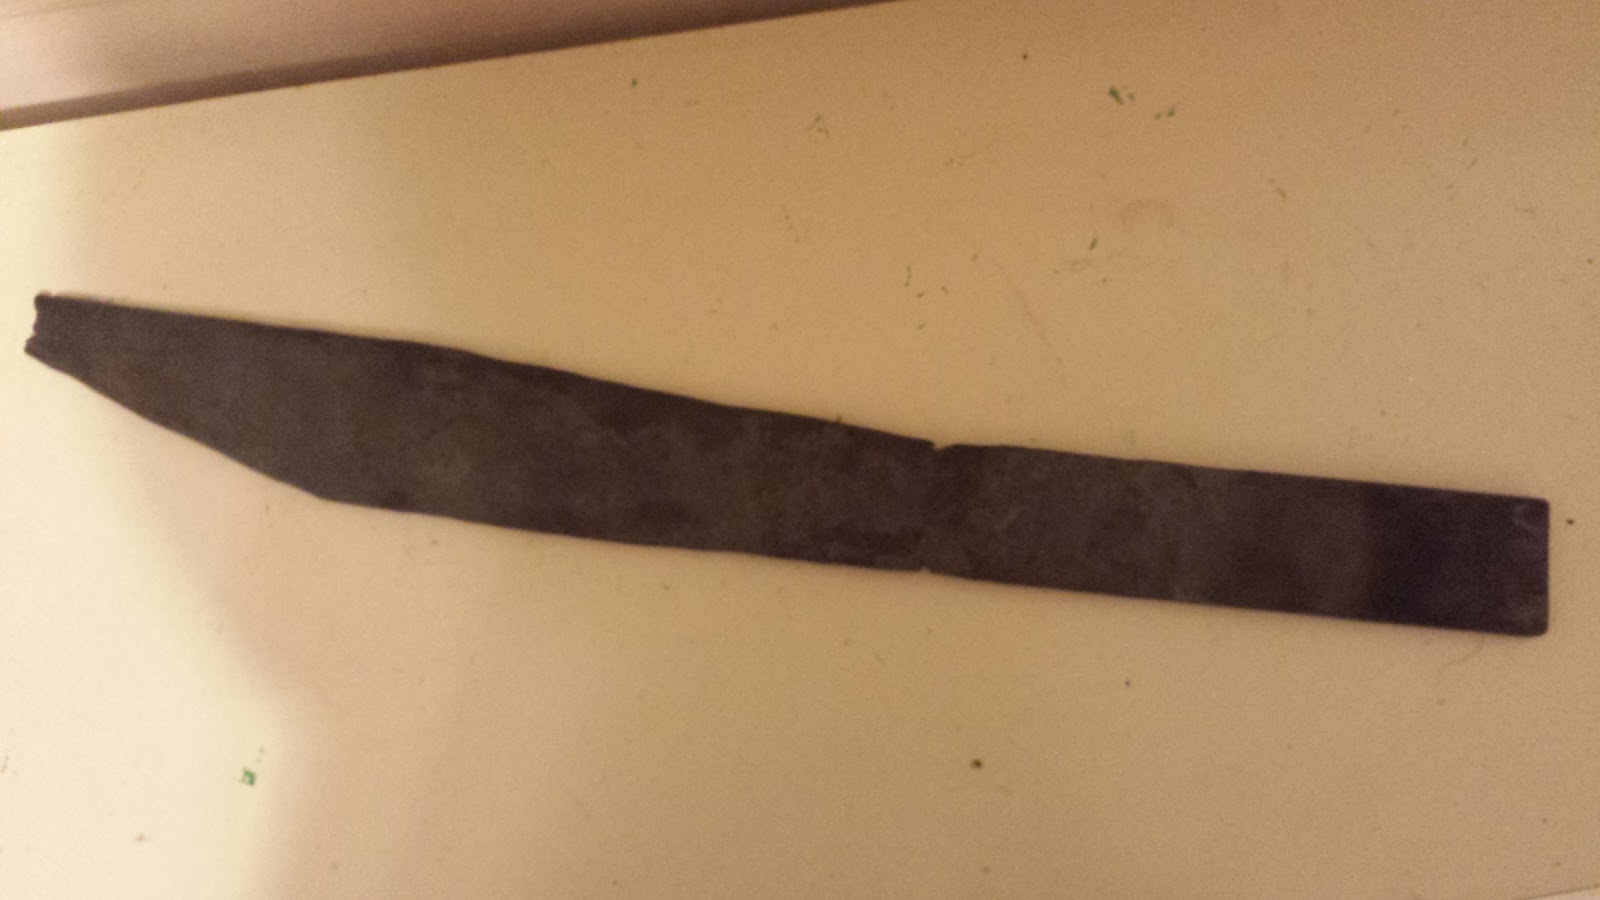
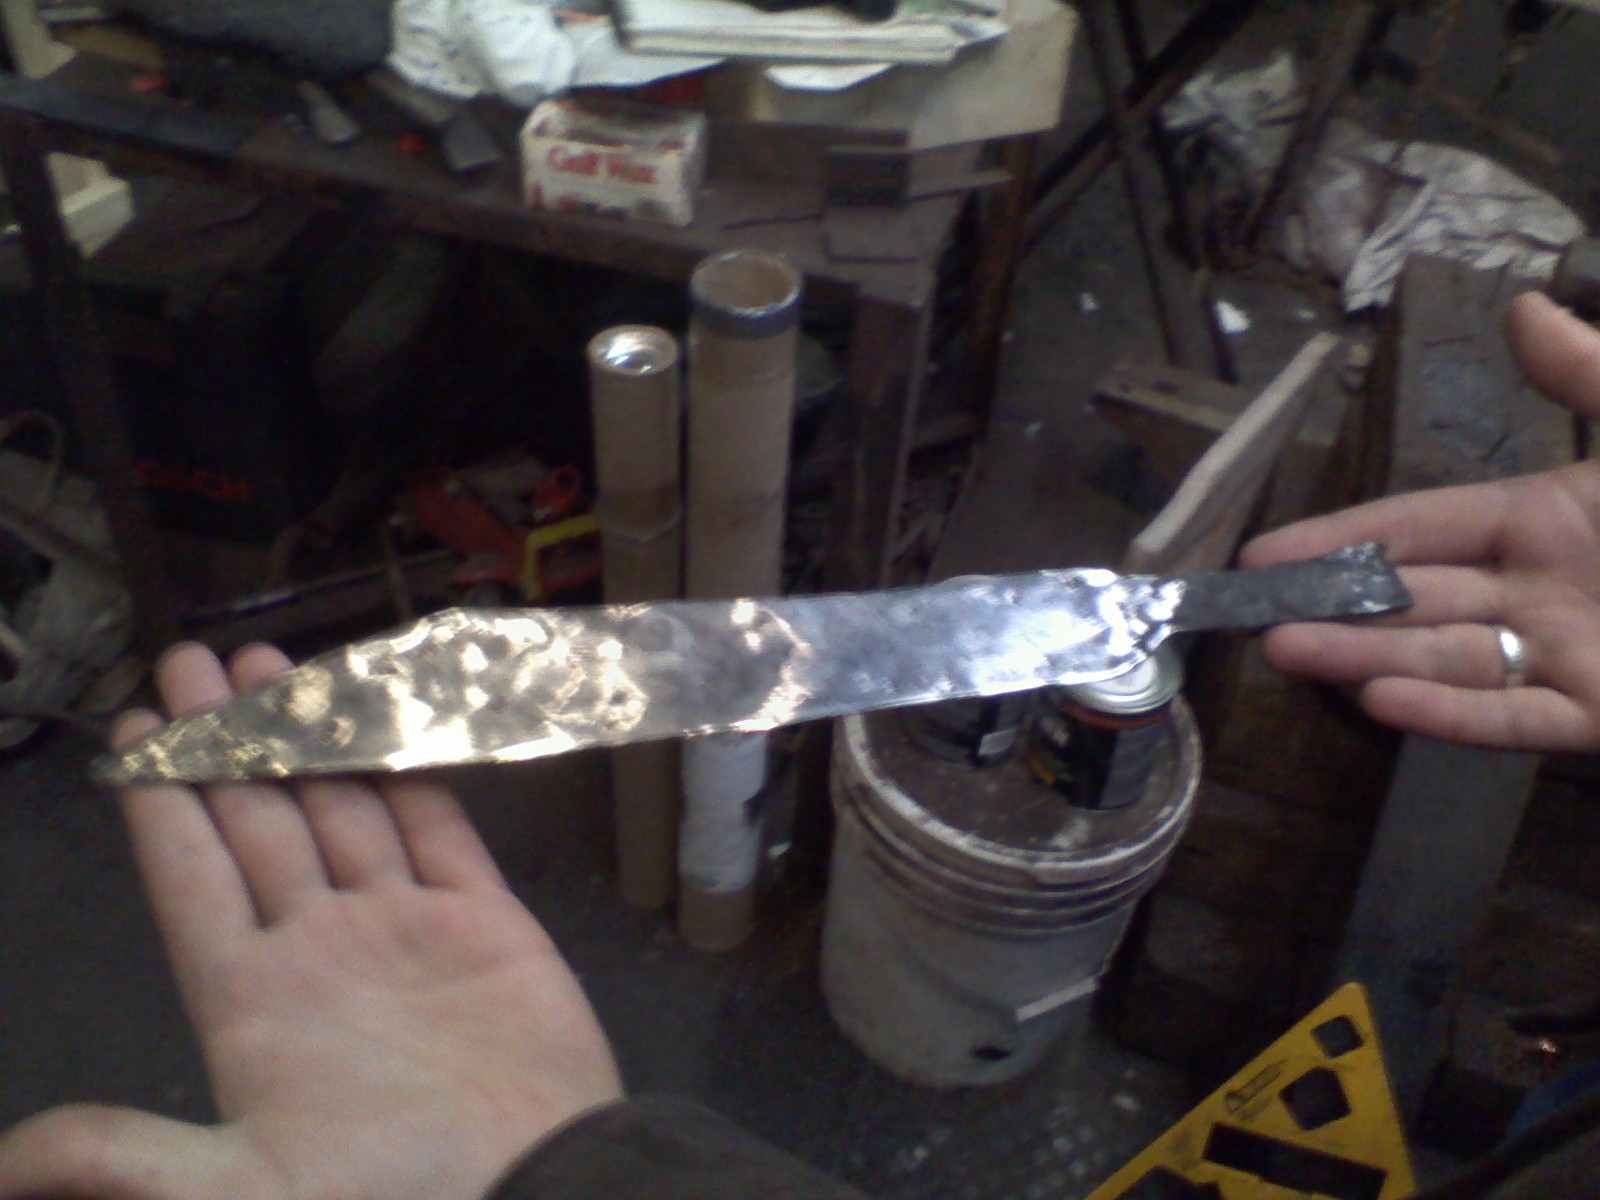
Once we decided how to deal with the burnt piece of metal and hammered it into our desired shape, we went back to working on the tip. Very carefully, in order to avoid any risk of burning, we heated this end to a mild orange color and hammered the back of the blade downward to form a distinct point, carefully re-aligning the blade every time it warped to one side or another. Once the point was finished, we moved on to cleaning up the blade by heating sections to a mild orange and smoothing them out with the flatter to eliminate as many dents and burn marks as we could. Once we were satisfied that the blade was straight and relatively smooth, we quenched it in water and used the grinder to produce a shiny, metallic finish and remove as many of the smaller imperfections along the blade as possible.
 |
Although the grinder was able to remove much of the rough texture, the final blade is still marked with many tiny flecks and dimples. These are scars left over from the times the blade was left in the fire for too long and began to burn.
 |