Making of a Seax Knife (First Iteration)
Overview
This page details the forging of our first Seax knife by Matt Ryder and Connor Morette.
The Forging Process
 |
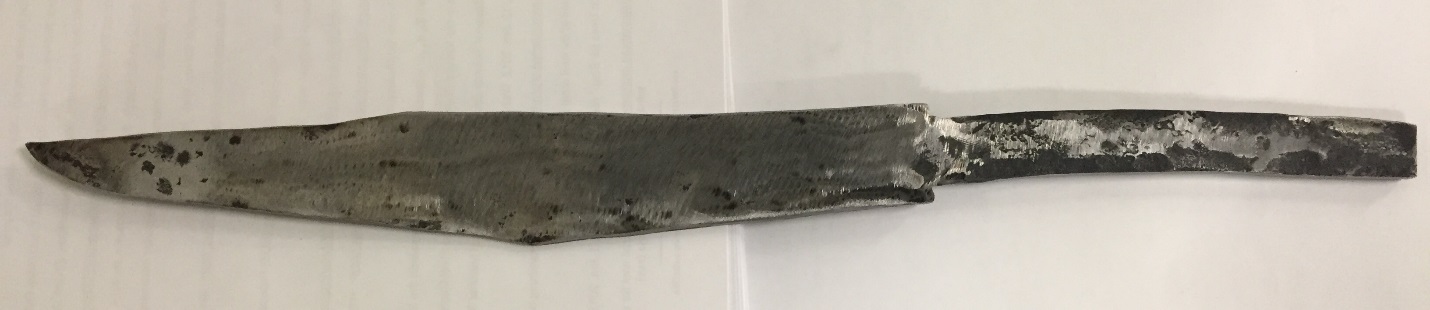
From the stock we cut roughly a 14’ piece and began by plasma cutting a general shape of our replica. In the era of the Vikings of course they were not fortunate enough to have such technology, however we took this method as to speed up the process slightly and simplify things. After this was completed, we had to grind down the edges of the metal to make a more straight finish due to the cut not being very straight and consistent. This inconsistency was due to not moving the tip at a constant speed as well as cutting too much in on one section making a notch that had to be grinded out. During the grinding process we also smoothed out all the edges in order to make the replica not have sharp edges and slightly easier to handle during the forging process.
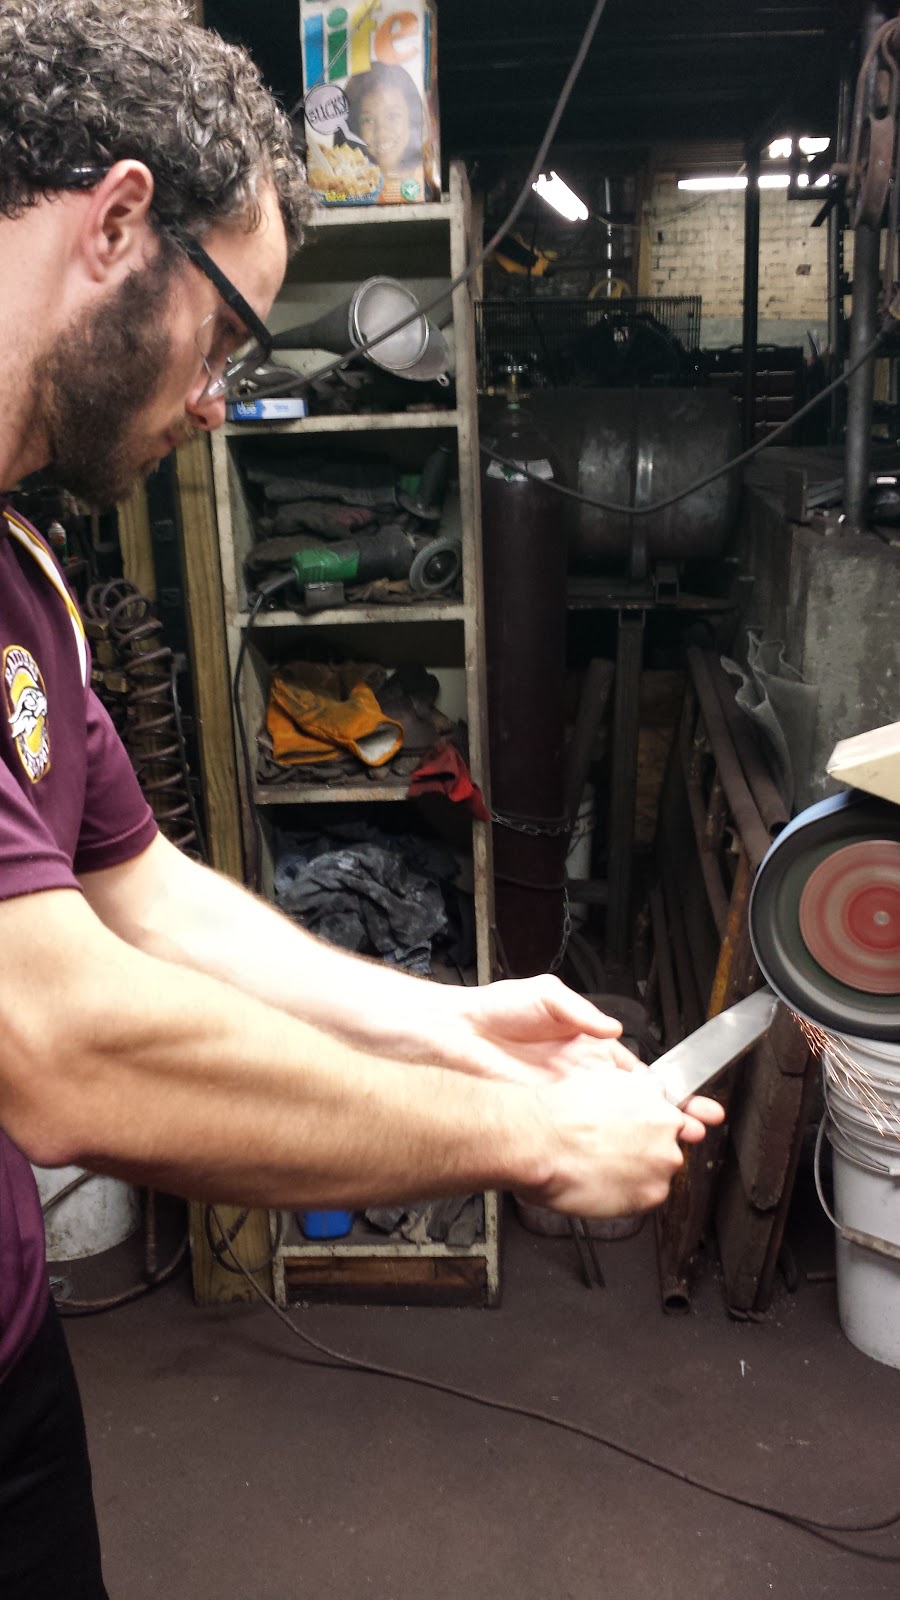
Figure 2 - Matt grinding the first replica into a rough shape.
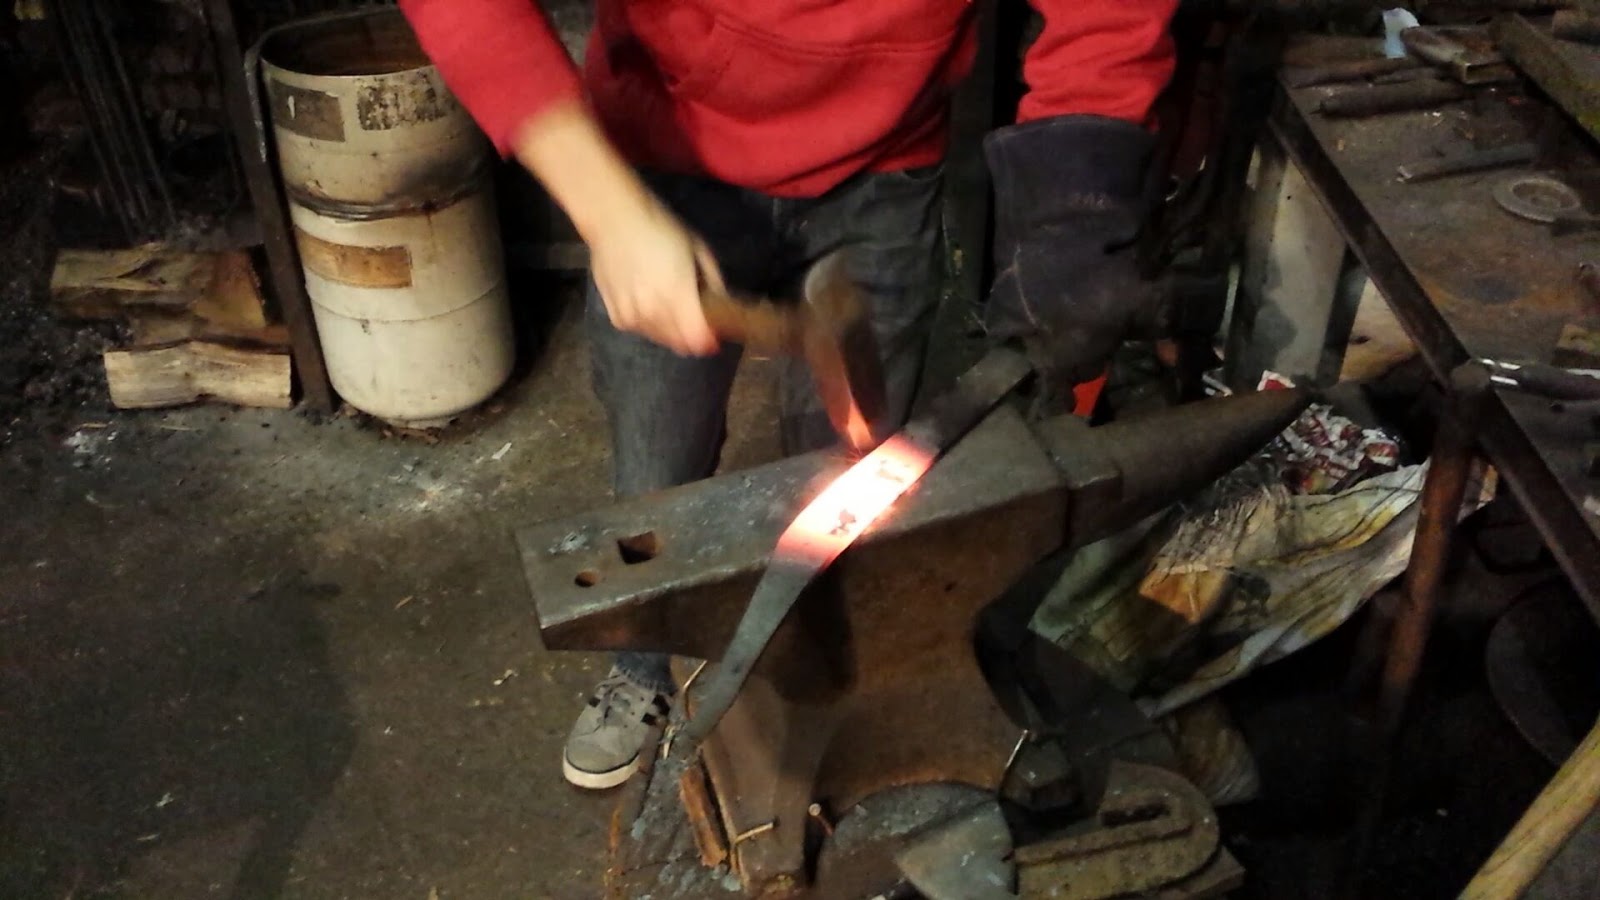
After grinding the steel replica down to have a relatively straight edge in the general shape we wanted our replica we began the process of forging it. Using the forge at Ferromorphics, we would heat up the metal until it was a bright orange and then proceeding to hammer out one edge of the replica since the seax knife is a single sided blade. We had to be careful of overheating the metal, which we almost did a few times, or else the metal replica would essentially fall apart where the metal was white hot. In the process of making the blade edge thinner we began to notice that the blade was beginning to curve a considerable amount. We found that the process of stretching out just one side naturally curves the blade, so since the seax is a straight blade with a thick back side, we had to straighten the blade back out every 2 or so heats. This conveniently also made the sections that we made slightly too thin (due to later needing enough material to grind out the hammer marks) a bit thicker due to us hammering on the edge to make it straight again.
 |
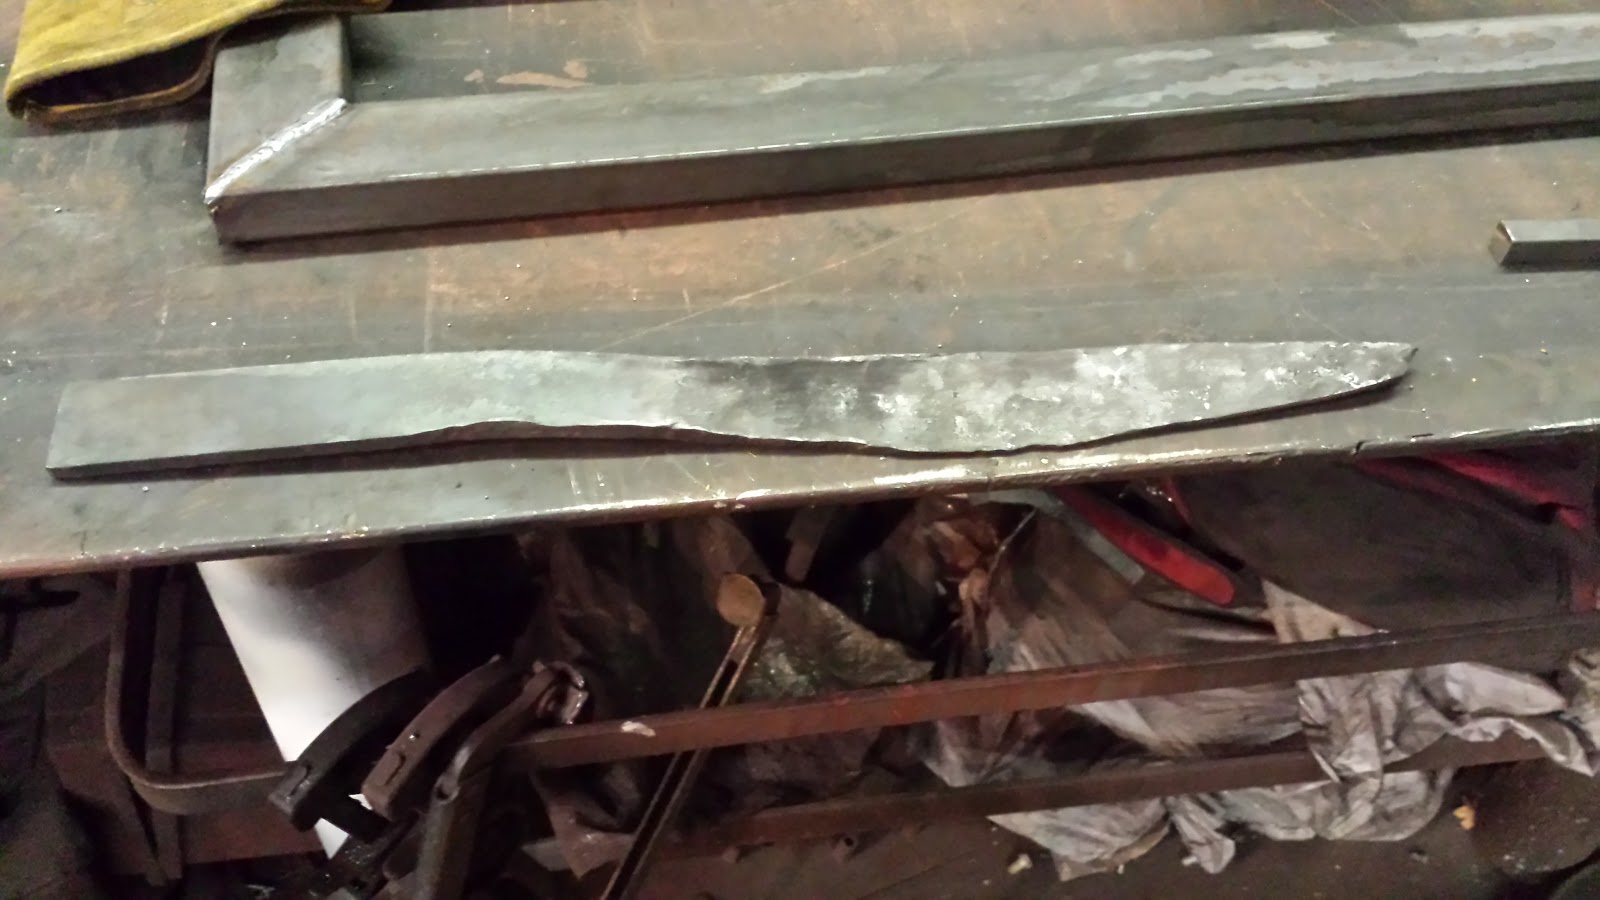
Another thing we also began to notice was that the blade was getting exceptionally longer than we originally expected, so much so that the 14’ replica we started with had become roughly 18’. We also noticed that by heating the tip up so many times and thinning it out to much that we effectively had “burnt” the metal leaving an undesirable finish. Since the replica had become too long anyways, we decide to cut the burnt tip off, which gave us the size we wanted. We did this by using a hot chisel insert in the anvil and hammering the undesirable section off. This method was used, although possibly not the most practical, due to time efficiency as well as no bandsaws being available for use at the time. After the replica was shortened, we created the tip of the blade from the section that we cut off due to needing to repair it from the cut-off anyways. After this was done we touched up on blade portion itself, extending it further down and trying to create more of a blade.
 |
The next step we took in making the blade was creating the tang. To create the tang we used a more modern method to show how modern methods have made things simpler. We used an angle grinder with a cutoff wheel in order to cut down the stock we had remaining to a more narrow piece and general shape we wanted so we did not have to do as much hammering. After this was done we heated the tang a few times and hammered it out to get the shape and length we wanted. Next, we used the angle grinder once again, this time with a grinding wheel, in order to grind down the blade itself in order to try and smooth out the surface, give it a better finish, and try and get out a majority of the hammer marks. After this was done we went around the outside of the blade with a grinding wheel in order to chamfer and smooth out the edges so that they were not sharp (it being a replica, we did not want it to be capable of actually hurting someone.
 |
The next process is the making of the handle itself. For this we decided to go with the method of wrapping the handle in leather due to time constraints. The leather was chosen in order to make the blade look authentic and of the time. The leather is cut into thin strips roughly half an inch to an inch thick in order to make the wrapping look good. One piece of leather is taken and wrapped and glued over the bottom of the tang to ensure no metal is showing. Once this was done an end of a leather strip is glued to the top of the tang and double wrapped in order to ensure it does not come loose, then the leather is wrapped in a spiral manner down the blade. Once at the bottom of the blade, the leather strip is once again glued in order to ensure it does not come undone. The final step if desired would be to buff out the blade in order to get a mirror finish.