Connecting a Windows Device to the Wireless Network?

Requirements

Windows Devices

  • Windows 7 requires Service Pack 1 or newer. Windows Vista requires Service Pack 2 or newer.
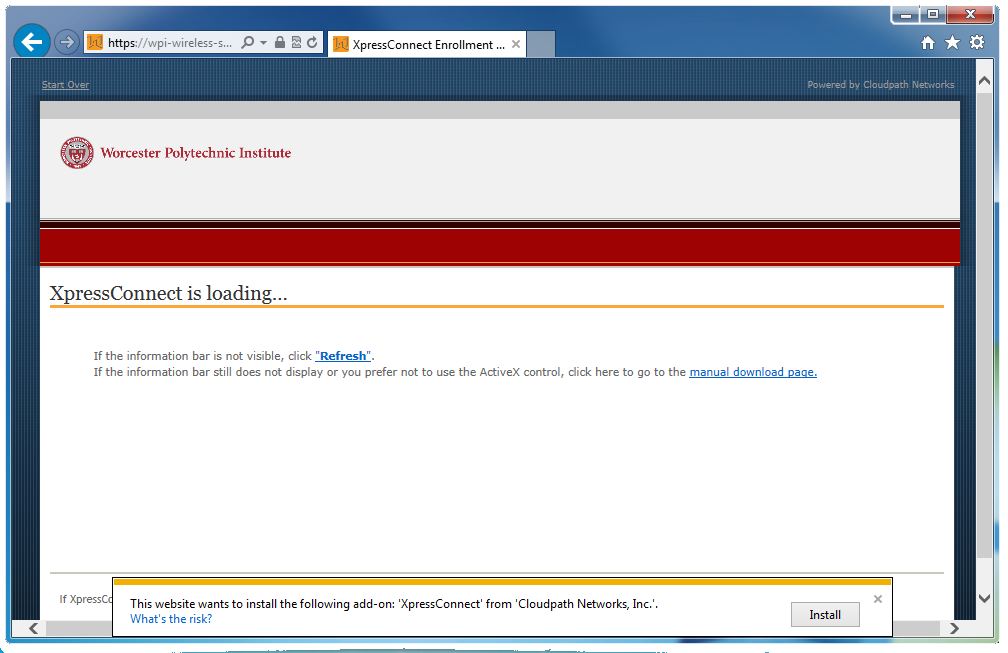
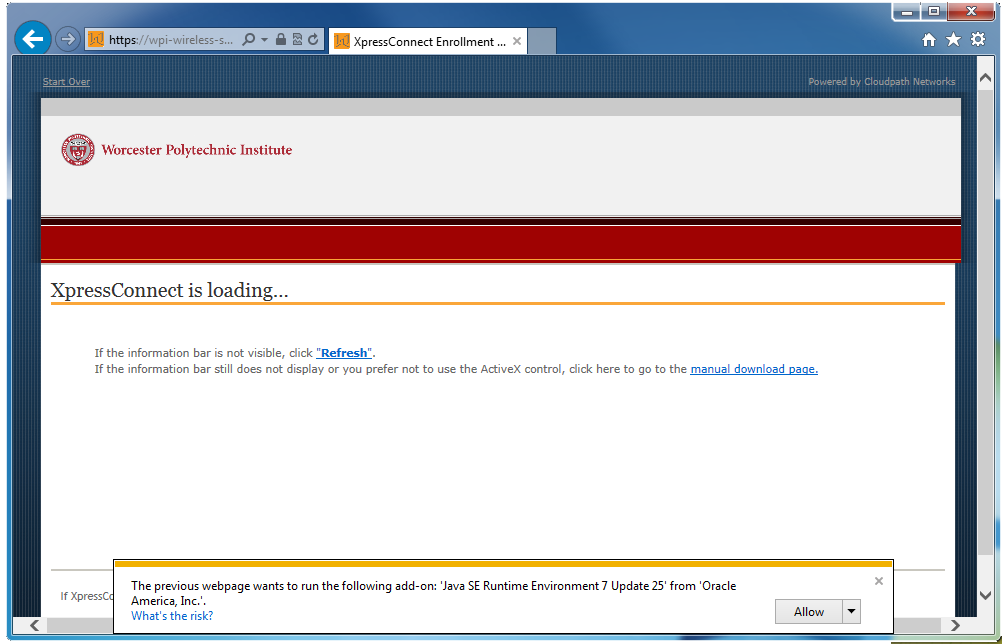
  • If you are using Firefox or Chrome, make sure you have Java 1.7 installed for automated installation. Internet Explorer does not require Java as it will use an ActiveX applet.
  • Safari for Windows does not work with Java 1.7 and is not supported for wireless setup.
  • When using Windows 8 and Internet Explorer, please be sure to use the Desktop version. For information on how to switch, please reference http://www.bleepingcomputer.com/tutorials/use-desktop-mode-in-internet-explorer-10/
  • Windows 8.1 Preview Release and RTM is not current supported.

Instructions

Step 1 - Get Connected!

  1. Unplug your wired Ethernet connection
  2. Connect to the WPI-Wireless-Setup wireless network

Step 2 - Open the Wizard

Open your web browser to https://wpi-wireless-setup.wpi.edu/

Step 3 - Acceptable Use Policy

In order to use the WPI Wireless network, you must understand and agree to the WPI Acceptable Use Policy. Once you have a complete understanding of the policy, select the checkbox and click Start.

Step 4 - Registration Warning

If you have not registered your device in the Wireless: Mobile Wireless Systems IP Range through the Network Registration page, you should do so now. While connected to the WPI-Wireless-Setup network:
  1. Visit http://netreg.wpi.edu/ and login with your WPI Username and Password
  2. Quick Registration will identify you
  3. Select IP Range Wireless: Mobile Wireless Systems
  4. Name the computer and choose an Operating System
  5. Wait up to 30 minutes to process the registration

If the Quick Registration is not displayed, please refer to Registering a computer for use on the Wireless Network for help.

Step 5 - Authentication

Provide your WPI Username and Password. Do not use any WPI credentials other than your own.

Step 6 - ActiveX Installation

If you are using Internet Explorer, the CloudPath provisioning software will attempt to execute an ActiveX add-on. To continue, you will need to click the Install button and allow XpressConnect to install and execute.

Step 6 - Java Installation

If you are using Chrome, Firefox or Internet Explorer with ActiveX disabled, the CloudPath provisioning software will attempt to execute a Java applet. To continue, you will first need to allow the Java SE Runtime to run. Then you will need to tell Java that you want to run the XpressConnect Enrollment System.

Step 7 - XpressConnect

Once the web browser has installed XpressConnect, the application will run. You will be prompted to allow the installation of several Security Certificates. You may also be prompted to run a Command Prompt with elevated permissions.

XpressConnect cannot identify the wireless network card

There are some reported cases in which XpressConnect cannot initially identify the wireless network card and reports an error when the user selects the correct one from the drop down list. This has been reported in Windows 8 and Windows 8.1 systems. In these cases, close XpressConnect and click Start Over to start the wizard over has been reported to work. Screenshots of the error messages are below.

Step 8 - Success!

After XpressConnect has completed - it will display a Successfully connected message and a web browser window will open displaying http://www.wpi.edu/.

Common Problems

The most common reason XpressConnect will fail is that the wireless device has not been registered in http://netreg.wpi.edu/. XpressConnect may display a message that An IP address was not acquired within the allotted time. If this is a newly registered device, please wait 30 minutes and try again.